

Rust is more than just a game. In Rust, players find themselves in a challenging environment where every decision can make the difference between success and failure.
The Rust experience can be greatly effected by many things, one of which is the quality of the server you play on. A reliable and well-managed server is crucial to smooth and uninterrupted gameplay. If you're thinking about setting up your server, you've come to the right place.
In this guide, we will discuss the main ways to host a Rust server. We'll explore the hard way: hosting your own server, and for those looking for a simpler, more secure way, we'll present an easier alternative: using hosting services such as Pine Hosting.

Understanding Rust Server Requirements
Setting up a Rust server requires consideration of your servers CPU and RAM requirements. CPU power is an important factor to consider when it comes to server performance, as it affects everything, for example, Pine Hosting use the best CPUs for their Rust servers combined with high speed RAM, this ensures smooth gameplay, it forms the backbone of any Rust server. Tools like Pine Hosting's Rust RAM Calculator are indispensable for calculating memory requirements but don't forget the CPU. Try to opt for a modern CPU with a high clock speed to handle the game's workload efficiently. Balancing these basic components is your first move in creating a Rust server.
Pine Hosting's Rust RAM Calculator Preview

Self-Hosting a Rust Server
Self-hosting a Rust server offers lots of control, but requires technical knowledge, a commitment to regular maintenance and doesn't come with the features or easy-to-use UI of hosting services like Pine. However, self hosting can be a great solution for temporary servers or if you are playing locally so here's how to get started!
Hardware Requirements
To start with, make sure your hardware is suitable. A modern CPU with a high clock speed and several reserved cores is recommended. Combine this with a minimum of 16GB of RAM, reserving much of it for rust. Don't skimp on storage either, an SSD will greatly improve load times and overall performance.
Setting Up SteamCMD
SteamCMD is what Rust uses to install Steam-related files and is also the way to install and update the Rust server.
To set up your Rust server using SteamCMD, you'll need to follow these generalized steps:
- Create a Directory for SteamCMD and your server: Designate a space on your system, like
D:\SteamCMDto steamcmd and another likeD:\RustServer. - Get SteamCMD: Download the SteamCMD utility from the official source provided by Valve.
- Unzip SteamCMD: Extract the 'downloaded' files into the SteamCMD directory you've created.
- Run SteamCMD: Launch the
steamcmd.exefile. You might need to confirm your intention to run the program if prompted by your system's security features.
A video showing how to setup SteamCMD
Installing the Rust Dedicated Server
To get the Rust server files installed, input these commands into SteamCMD, executing them one at a time:
force_install_dir "D:\RustServer\": This directs SteamCMD to place all server files into your designated Rust server folder. ReplaceD:\RustServer\with your real server folder!login anonymous: This command logs you into SteamCMD anonymously, which is sufficient for server files.app_update 258550: Executes the command to download or update Rust to the latest version available.quit: This will exit SteamCMD once the server files are downloaded or updated.
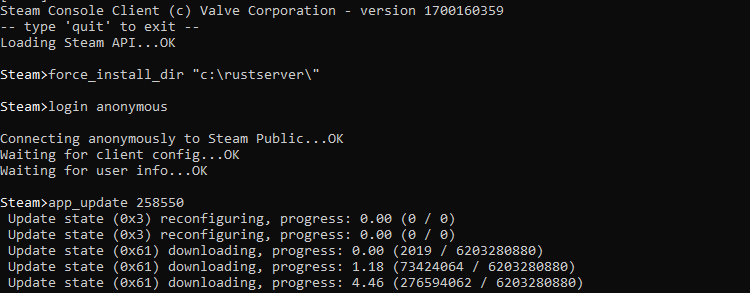
For a basic Rust server setup, these files should suffice. If you aim to run a modded server, additional configurations and files will be necessary to accommodate those changes.
Crafting a Batch Script for your Rust Server
A batch script is a complex yet powerful way to start a Rust server. It allows for automated updating and server restarts in the event of a crash. Below is a modified version of a typical script. Make a "ServerScript.bat" file in your Rust server folder and paste it changing the file paths to reflect your saved location.
echo off
:start
D:\steamcmd\steamcmd.exe +login anonymous +force_install_dir D:\rustserver\ +app_update 258550 +quit
RustDedicated.exe -batchmode +server.port 28015 +server.level "Procedural Map" +server.seed 1234 +server.worldsize 4000 +server.maxplayers 10 +server.hostname "Name of Server as Shown on the Client Server List" +server.description "Description shown on server connection window." +server.url "http://yourwebsite.com" +server.headerimage "http://yourwebsite.com/serverimage.jpg" +server.identity "server1" +rcon.port 28016 +rcon.password letmein +rcon.web 1 -logfile rustserverlog.txt
goto start
Now you have made your server it's time to connect! To do this go to rust and hit F1, then type the following and hit enter: client.connect localhost:28015
Using a Hosting Service
Opting for a hosting service to manage your Rust server can greatly improve the process. This approach is ideal for those seeking convenience, performance and security above all else.
Hosting provides the hardware and network infrastructure necessary to run a Rust server. It eliminates the need to invest in personal hardware and the complexities of server management, saving both time and money.
Advantages of a hosting service
- Easy configuration: Hosting services offer pre-configured servers that can be up and running in a matter of minutes.
- Maintenance: The hosting provider manages server hardware, security and software updates.
- Reliability: Professional hosting services include uptime and support guarantees, ensuring that your server is accessible 24 hours a day.
- Features: Hosting services like Pine Hosting come with useful features such as a one-click plugin installer, easy config and much more!
How to use Rust server hosting
- Select a Service: Choose a reputable hosting provider known for the quality of their service such as Pine Hosting.
- Choose a Plan: Select a hosting plan that meets your desired server specifications, balancing cost with performance needs. For this, you can use the Pine Hosting RAM calculator.
- Server Settings: Use the hosting provider's control panel to configure your server settings, such as server name, map, and player slots.
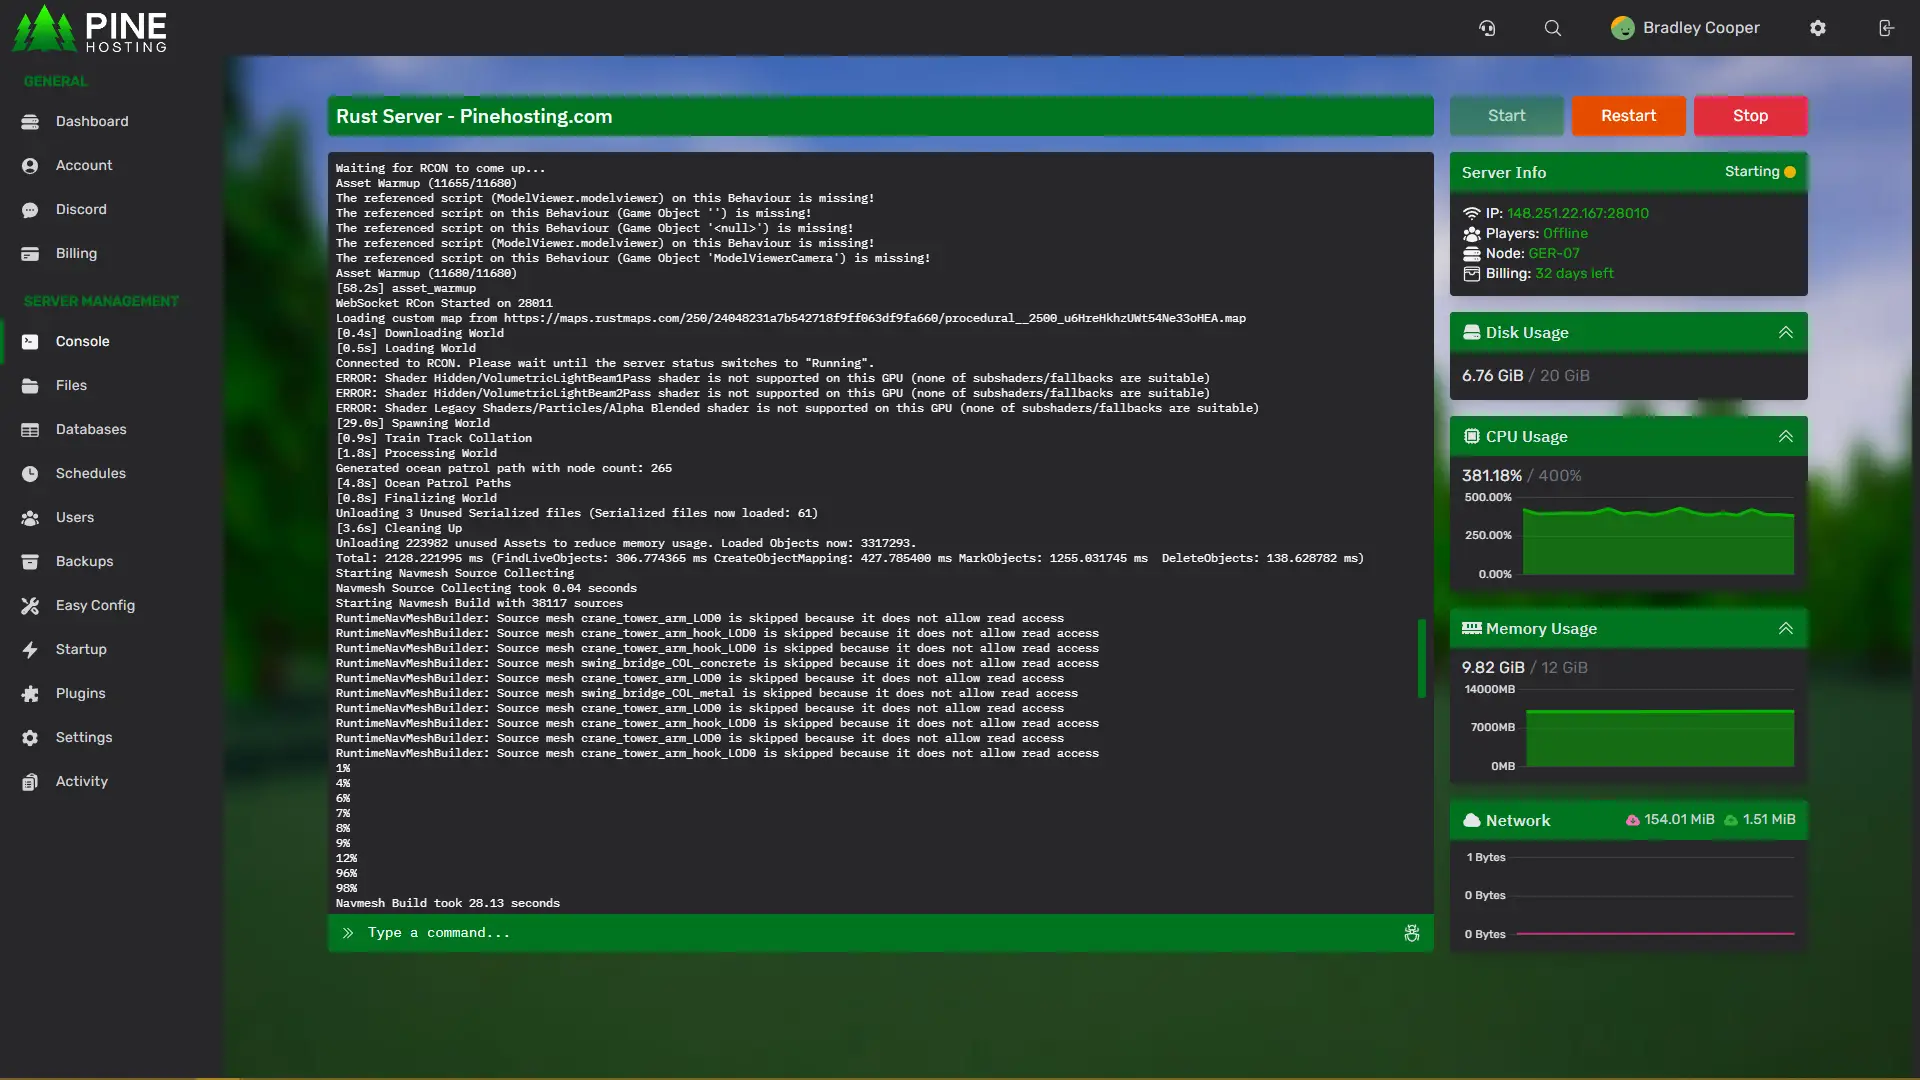
- Go live: Once configured, get your server up and running. It will usually be up and running in a matter of minutes, ready for players to join.
- Management: Access the server management tools provided by the host to perform routine maintenance tasks such as reboots, upgrades, and mod installation.
Most popular Rust Hosting: Pine Hosting
Pine Hosting excels in customised Rust server hosting solutions, offering easy-to-use tools and dedicated support. With Pine Hosting, you can rest assured that your server is in safe hands, leaving you more time to enjoy the game.
By choosing a hosting service, you can avoid much of the complexity that comes with self-hosting. This route offers a more user-friendly server management experience, allowing you to focus on playing Rust rather than the underlying technical challenges.
Conclusion
In Rust, setting up the perfect server is important. While self-hosting offers control and can save money it demands substantial time and expertise. Conversely, opting for a hosting service, like Pine Hosting, presents a more streamlined experience. These services simplify the process, ensuring stability, ease of maintenance, and allowing you to focus more on gameplay and less on server upkeep. In the end, for most, the advantages of a hosting service, with its ease and reliability, make it the preferred choice for hosting a Rust server.