

Changing your Project Zomboid server settings lets you control almost every part of your multiplayer experience, from player limits and PvP to zombie populations, loot rarity, XP rates, and how quickly electricity or water shuts off.
On a self-hosted Build 42 server, these options are mainly split between two configuration files. This can be confusing for beginners because standard server settings and gameplay sandbox settings are stored separately.
This guide explains where both files are located, how to edit them correctly, and how Project Zomboid server hosting can make the entire process much easier.
How To Change Settings On A Self-Hosted Project Zomboid Server
Before editing anything, completely stop your server. Some settings are loaded when the server starts, so changing files while it is running can prevent your changes from applying correctly.
Your Project Zomboid configuration files are normally stored separately from the dedicated server installation itself.
On Windows, go to:
C:\Users\YourUsername\Zomboid\Server\
Inside this folder, you should find the files belonging to your server. The exact filenames depend on the name used when starting the server.
For the default server name, servertest, you will commonly see:
servertest.ini
servertest_SandboxVars.lua
The .ini file handles general multiplayer server configuration, while _SandboxVars.lua controls most of the actual gameplay rules. Project Zomboid administrators have long used these separate files for dedicated-server and sandbox configuration.
Editing The Project Zomboid Server Settings File
Start by opening:
servertest.ini
You can open the file with Notepad, Notepad++, or another text editor.
This file contains the standard settings for your Project Zomboid server, including options related to multiplayer behavior, access, server visibility, mods, and player management.
Depending on your setup, you may find settings controlling things such as:
- Maximum player slots
- PvP
- Public server visibility
- Server passwords
- Safehouses
- Player respawning
- Steam Workshop items
- Enabled mods
- Server pause behavior
Settings are normally written in a simple format such as:
SettingName=value
For example, a Boolean option may use:
true
or:
false
while numerical settings require a number.
Avoid deleting settings you do not understand. Change only the value after the = unless you specifically know the configuration requires something different.
Once you are finished, save the file.
Changing Sandbox Settings
Most gameplay customization is handled separately through:
servertest_SandboxVars.lua
This is one of the most important files when creating a custom Build 42 server.
Sandbox settings can control areas such as:
- Zombie population
- Zombie strength and behavior
- Loot rarity
- XP progression
- Day length
- Infection behavior
- Water shutoff
- Electricity shutoff
- Vehicle settings
- Meta events
- Food and item behavior
- Respawn and world rules
Project Zomboid continues to add and adjust sandbox options throughout Build 42, including additional sandbox settings introduced during the Build 42 development cycle.
Open the _SandboxVars.lua file in a text editor and locate the option you want to change.
Unlike the normal .ini configuration, the SandboxVars file uses Lua-style formatting. A section may look similar to:
Setting = 1,
or:
Setting = true,
Be careful with punctuation. Removing commas, brackets, or other parts of the structure can cause the file to load incorrectly.
What Do The Sandbox Values Mean?
One of the confusing parts of manually editing Project Zomboid sandbox settings is that some options use numerical values rather than obvious descriptions.
For example, you may see an option set to:
1
2
3
rather than seeing words such as "Low", "Normal", or "High".
The number represents one of the available choices for that particular sandbox option. The exact meaning depends on the setting, so you should not assume that a higher number always means "more".
This is where manually editing a self-hosted server can become difficult for beginners. You may need to determine what each value represents before changing it.
One alternative is to create a multiplayer configuration through Project Zomboid's own hosting interface using the options you want and then use the generated configuration as a reference. Dedicated servers use the same general SandboxVars format, making this useful when you are unsure which value corresponds to a particular option.
Restart The Server To Apply Your Settings
Once you have finished changing both configuration files, save them and start your Project Zomboid dedicated server again.
On a standard Windows installation, this will commonly be done through:
StartServer64.bat
Allow the server to fully load and then check whether your changes have taken effect.
If they have not, check that:
- You edited the correct server configuration.
- The server was stopped before editing.
- The filename matches the server name being launched.
- Your SandboxVars formatting is still valid.
- You saved the file before restarting.
Some server settings can also be managed through Project Zomboid's administrator interface while the server is running, although manually editing the configuration files remains useful when managing a self-hosted setup.
How To Change Settings With Dedicated Project Zomboid Hosting
Using dedicated Project Zomboid hosting removes much of the confusion that comes with manually editing .ini and .lua files.
With Pine Hosting, server owners receive an easy configuration panel that separates the available options into straightforward sections.
Instead of navigating to:
C:\Users\YourUsername\Zomboid\Server\
and opening configuration files manually, you can manage both your server settings and sandbox settings directly through the panel.
Server Settings
The server settings section gives you access to the normal multiplayer configuration without requiring you to understand the formatting of servertest.ini.
You can simply locate the option you want, change it through the interface, save the configuration, and restart the server when required.
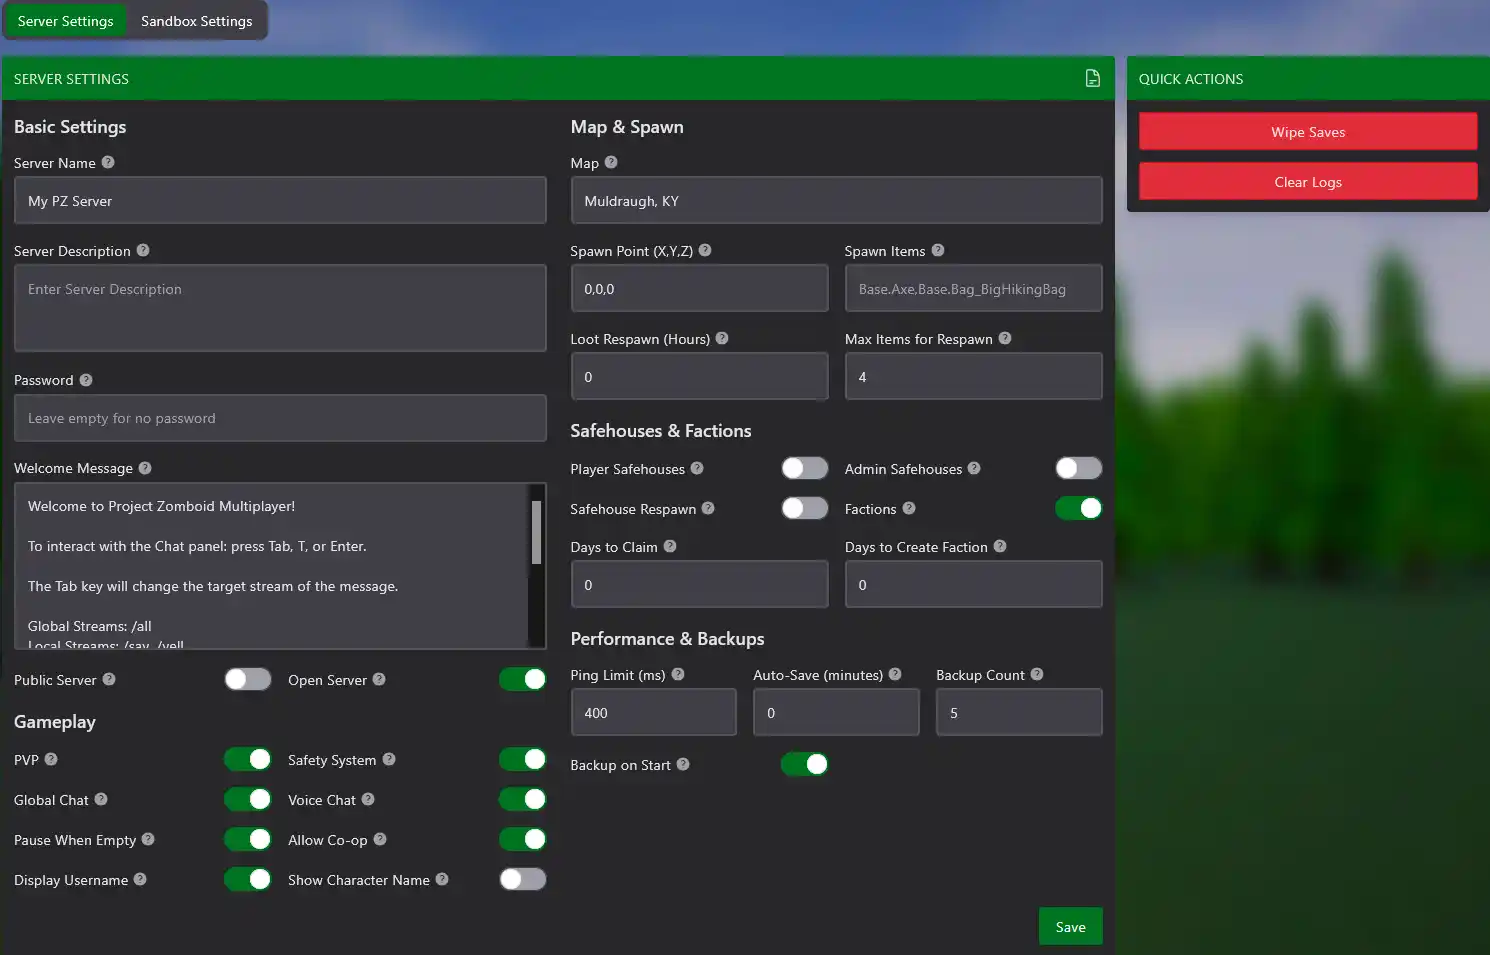
Sandbox Settings
Gameplay and sandbox configuration is also available through the panel.
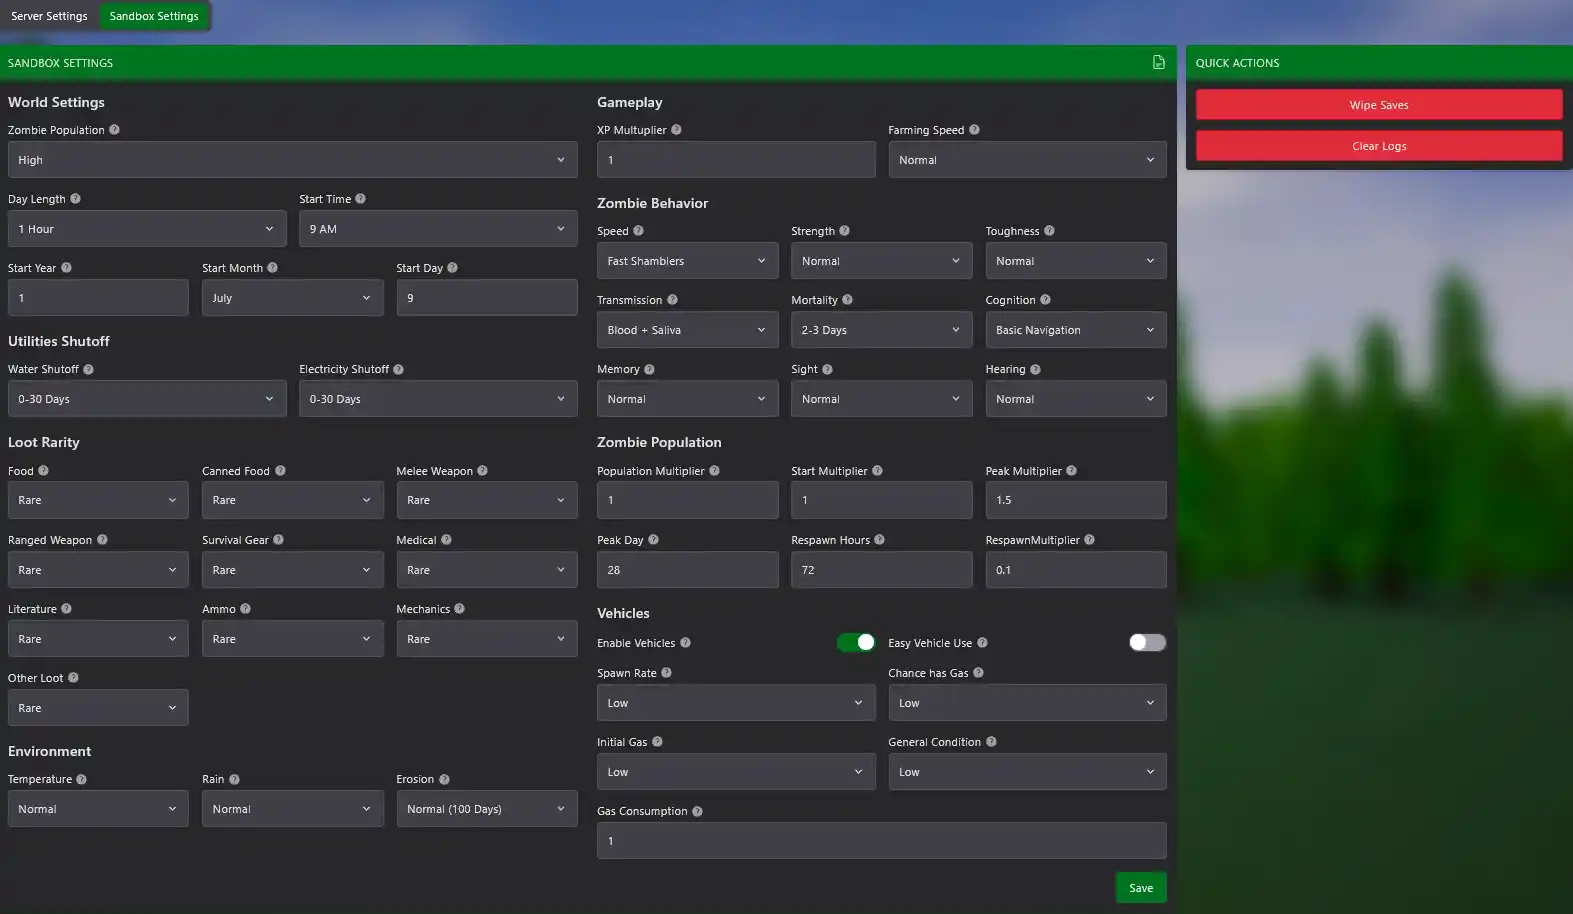
This makes settings such as zombie behavior, loot, XP, world rules, vehicles, and other gameplay options much easier to understand because you can interact with a normal UI instead of manually reading through servertest_SandboxVars.lua.
For beginners, this removes one of the biggest difficulties of self-hosting: figuring out which file contains a setting, what a numerical value means, and whether the configuration syntax is correct.
With Project Zomboid server hosting, you can focus on choosing how you want the server to play rather than figuring out how the configuration files are structured.
Customize Your Build 42 Server With Pine Hosting
A custom Project Zomboid server can be anything from a difficult survival experience to a relaxed private world or heavily customized multiplayer community.
With Pine Hosting's Project Zomboid hosting, you can manage both server and sandbox settings through an easy-to-use panel without manually editing .ini or .lua files.
Combined with server controls, backups, updates, Workshop management, and other hosting features, this makes managing a Build 42 server much more accessible for both new and experienced owners.
Start your Project Zomboid server with Pine Hosting and customize your Build 42 world without the configuration-file hassle.