

Setting up and managing a dedicated Hytale server involves configuring both server-wide behavior and world-specific gameplay rules. Whether you’re using Hytale server hosting from a provider or running your own hardware, Hytale’s configuration system gives you granular control over core server options and individual world settings.
This article explains:
- How Hytale server settings and world settings are stored
- How to edit server configuration for a Hytale multiplayer server
- How to edit world settings for gameplay rules
- How hytale hosting with server settings editor simplifies configuration
Where Hytale Server Settings Are Stored
Hytale stores configuration across two main areas: the server root directory and each world’s folder inside the universe directory.
Typical layout:
/hytale-server-root/
├── .cache/                                  (optimized cache files)
├── logs/                                              (server logs)
├── mods/                                                (mod files)
├── universe/                                  (world and save data)
│         └── worlds/                            (all world folders)
│                └── / <WorldName>/            (current world files)
│                          └── config.json          (world settings)
├── bans.json                                       (banned players)
├── config.json                                 (main server config)
├── permissions.json                     (permission group settings)
└── whitelist.json                             (whitelisted players)
What These Files Control
- config.json (server)
Global server configuration such as server name, player limits, networking behavior, and performance limits. - permissions.json
Permission groups, roles, and command access. - whitelist.json
Players allowed to join when whitelist mode is enabled. - bans.json
Banned players list. - universe/worlds/<WorldName>/config.json
World-specific gameplay rules such as PvP, fall damage, NPC behavior, spawn markers, and time control.
File names and layout can vary slightly depending on your Hytale server host and operating system.
Editing Main Server Configuration (Server-Wide Settings)
Server-wide settings are controlled in the root config.json file. These settings affect the entire Hytale server hosting environment.
Common server settings include:
- Server name and display information
- Maximum player count
- View distance limits
- Password protection
- Network binding and ports
- Performance and behavior options
How To Change Server Settings
- Stop the server completely from your control panel or console.
- Open
config.jsonusing a text editor. - Modify the values you want to change.
- Save the file.
- Start the server again.
Always avoid editing configuration files while the server is running. This prevents conflicts and ensures changes load correctly.
Editing World Settings (Gameplay Rules)
Gameplay rules are stored separately for each world inside:
universe/worlds/<WorldName>/config.json
World configuration allows you to control how gameplay behaves independently from server-wide settings.
Common world options include:
- PvP enable or disable
- Fall damage toggle
- NPC spawning
- Spawn marker visibility
- Game time pause
- Freeze all NPCs
How to Change World Settings
- Stop the server.
- Navigate to the world’s
config.jsonfile. - Open the file in a text editor.
- Change the desired settings.
- Save the file and restart the server.
Each world can have different rules, allowing flexibility when running multiple worlds on the same Hytale game server.
Applying Changes Safely
To avoid downtime and configuration issues:
- Always stop the server before editing files
- Back up configuration files before making changes
- Edit one setting at a time
- Restart the server fully after saving
- Review logs if the server fails to start
Best Practices When Editing Configs
✔ Always create backups before editing
✔ Change one setting at a time
✔ Validate JSON formatting
✔ Monitor server performance after changes
✔ Keep a changelog of edits
Troubleshooting Common Issues
Server Won’t Start
- Formatting error in JSON
- Missing comma or bracket
- Invalid value type
Restore backup and check logs.
Settings Didn’t Apply
- Server was not fully restarted
- Edited the wrong file
- Cached settings
Stop and start the server again.
Lag or Performance Drops
- Reduce view radius
- Lower max players
- Limit NPCs and entities
- Upgrade server resources
How To Change Hytale Server Settings On Pine Hosting (Easy Config)
If your server is hosted with Pine Hosting, you don’t need to edit files manually.
Pine Hosting provides a custom Easy Config panel that lets you manage all Hytale server settings and world settings using sliders, toggles, and input fields without risk of formatting errors.
Step 1 – Open Your Pine Hosting Panel
- Log into your Pine Hosting dashboard.
- Select your Hytale server.
- Head over to Console tab and stop your server (if online)
- Open the Easy Config tab.
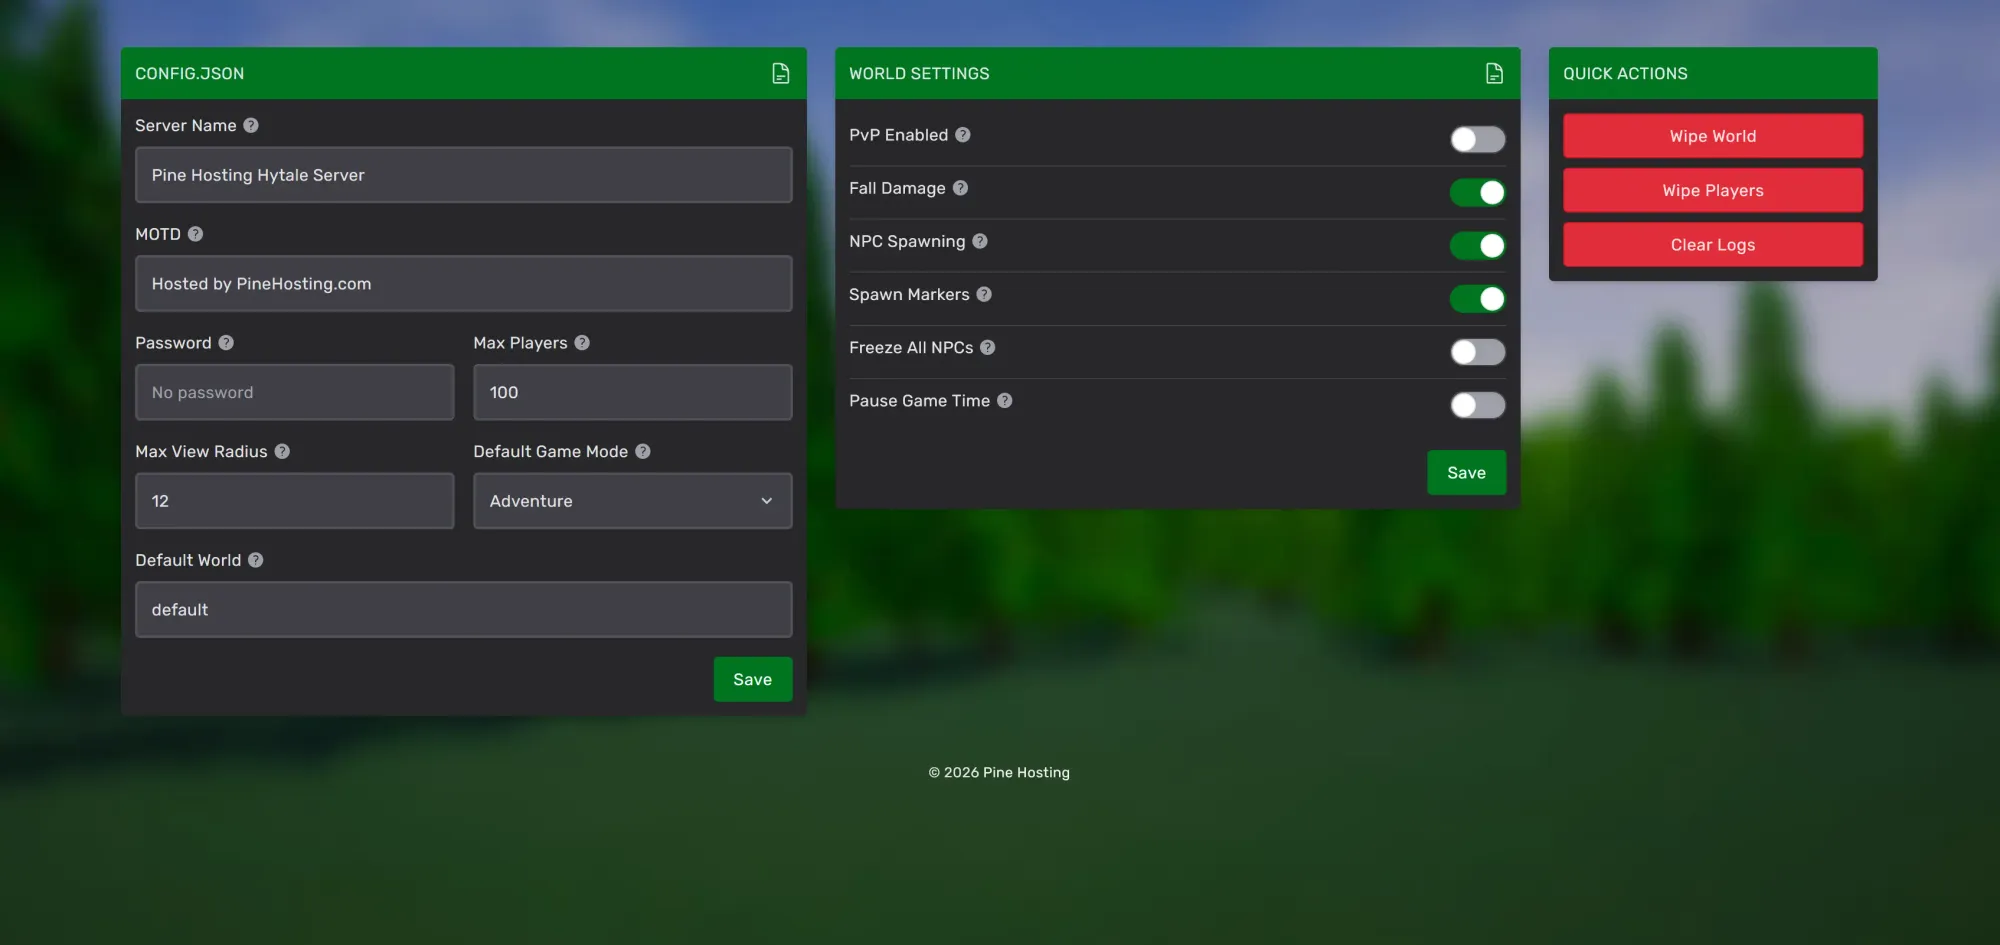
Step 2 – Modify Server Settings
Inside the Easy Config panel, you can instantly edit:
Server Configuration
- Server Name
- MOTD
- Password protection
- Max Players
- Max View Radius
- Default Game Mode
- World Name (Create new world or use existing)
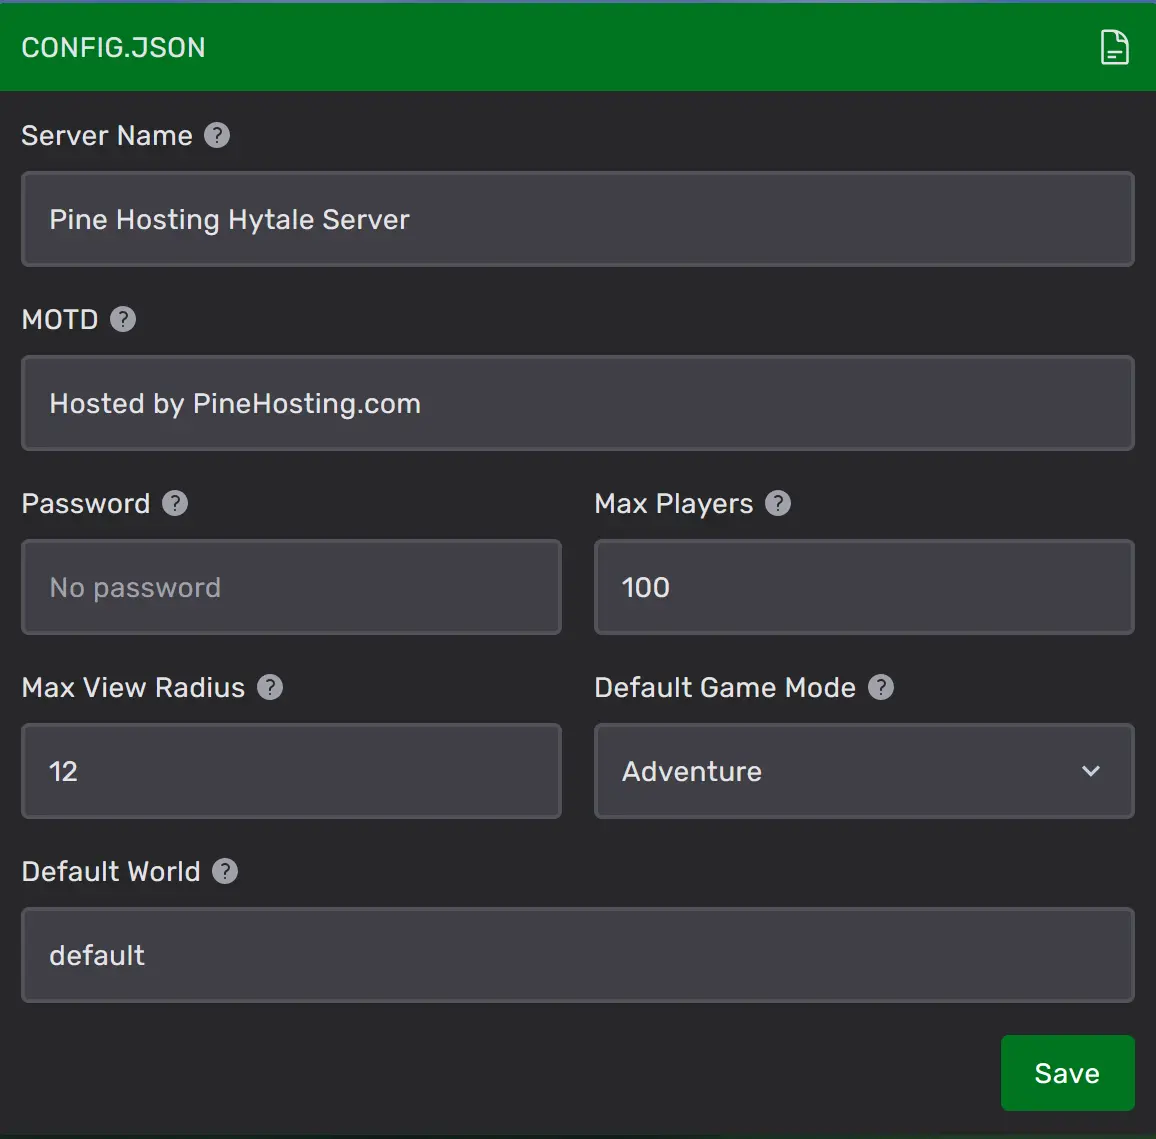
Simply adjust the fields and click Save.
World Settings
Toggle gameplay options instantly:
- PvP Enabled
- Fall Damage
- NPC Spawning
- Spawn Markers
- Freeze All NPCs
- Pause Game Time
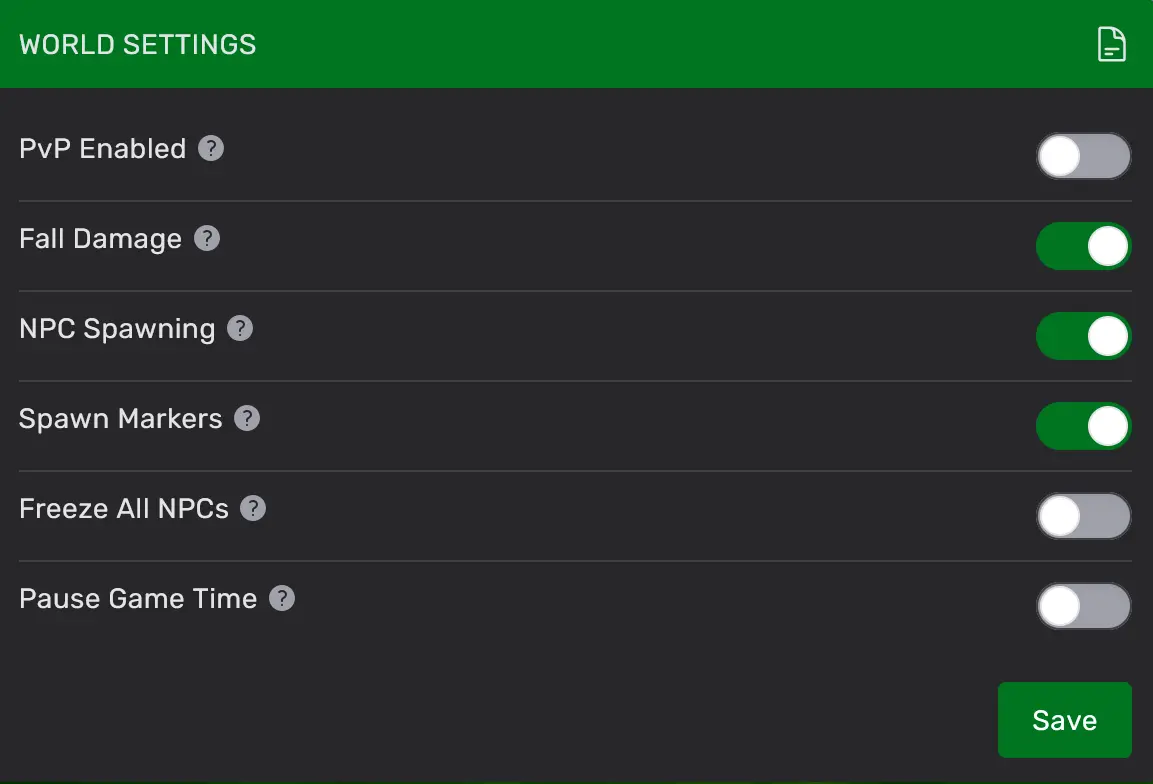
Once you have made your changed click the save button.
Quick Actions
Pine Hosting also provides built-in one-click tools:
- Wipe World – Reset the entire world
- Wipe Players – Reset player data
- Clear Logs – Free up disk space
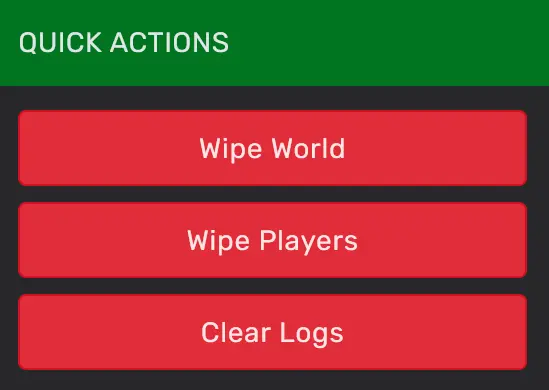
No manual file deletion required.
Step 3 – Restart Your Server
When done editing, head back over to your servers Console tab and Start your server.
Why Hytale Hosting With A Server Settings Editor Matters
Manual configuration provides flexibility, but it also introduces risk. Editing JSON incorrectly can prevent a server from starting or cause unexpected behavior.
Hytale hosting with server settings editor, simplifies management by allowing settings to be changed through a visual interface rather than raw files.
Benefits include:
- Faster configuration without manual file editing
- Reduced risk of formatting errors
- Easier management of both server configuration and world settings
- Built-in maintenance tools such as wipes and cleanup
- Faster workflows for scaling and ongoing management
When selecting a Hytale server host, choosing a platform that includes a server settings editor improves reliability, saves time, and reduces technical overhead.